Tampilkan postingan dengan label Painting. Tampilkan semua postingan

oops I did it again.....painted tile floor 2.0

Oktober 25, 2017 0

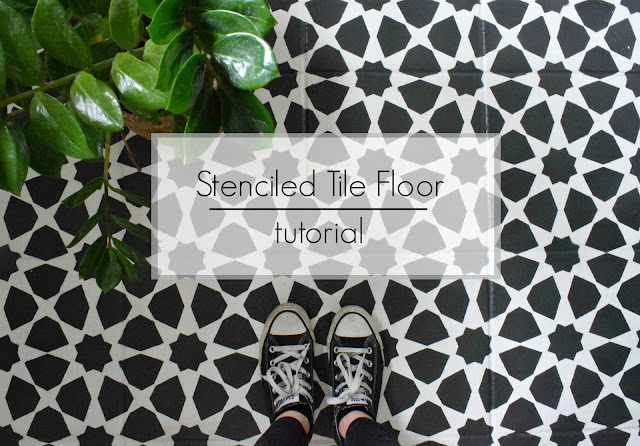
how to stencil a tile floor with chalk paint to get the look of Moroccan tile


So you know how I've been saying since the dawn of time that the en-suite is practically finished and I just have to add the finishing touches and it'll be done? 

Well.....somehow last week I went in there to put up a frame and ended up stencilling the floor.

That's how it works around here, I'll put things off for months and then find myself elbow deep in paint at one in the morning, or ripping out manky carpet after just going upstairs to put some washing away. I've learned to just go with it. Gavin has learned to not ask questions. 

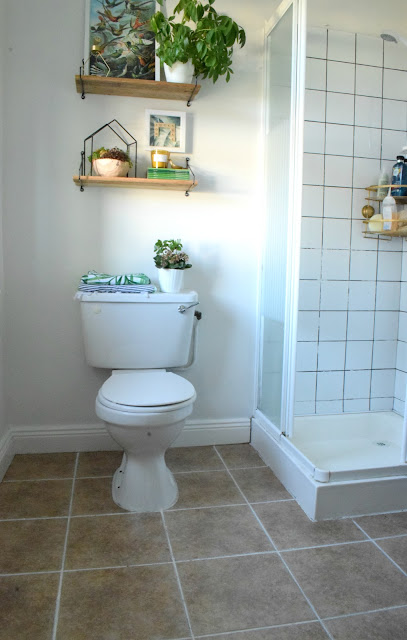
If you've been with me for a while you'll know that I painted my kitchen floor to make it less vomit-inducing while we saved up to have it ripped out and replaced. Well, the floor in here was less offensive, but just as dated. I had thought I would just leave it as is, hoping that it would kind of just fade into the background, but then as the rest of the decor in here came together I thought it would be a shame to have the floor sitting there, all beige and boring, ruining the look.
how to stencil a tile floor with chalk paint to get the look of Moroccan tile

So yeah, one day I came up here to put up a few pictures, realised I had a tin of paint, a stencil and two hours of actual free time until I had to pick Max up from playschool. It was a perfect DIY storm, and before I knew what was happening I had a coat of white paint on the floor. 

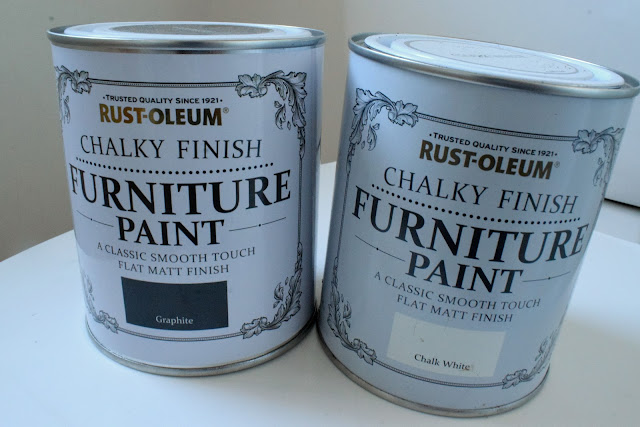
When I painted the kitchen floor I used primer and actual tile paint, doing two coats of each, and while it did do the job I definitely had to maintain it, touching it up every six weeks or so as little chips appeared in it. Plus the paint was stinky and expensive, so this time I decided to try a different method that I had seen on a lot of American blogs, namely, chalk paint covered by a protective finish, in my case matte water based varnish.


how to stencil a tile floor with chalk paint to get the look of Moroccan tile


how to stencil a tile floor with chalk paint to get the look of Moroccan tile


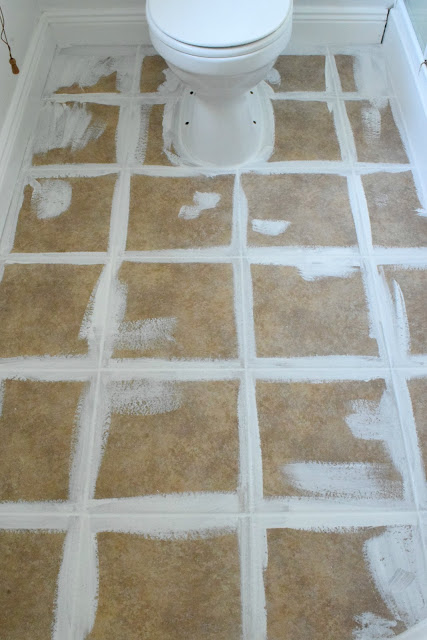
I thoroughly cleaned the floor and let it dry first, then I cut in around the edges and along the grout lines with a brush before going over the whole floor with a small roller. And here's my first tip, chalk paint dries ridiculously fast, so if I were to do this again I would work in small sections rather than doing the whole floor at once, as I found I had to be very careful not to lift the paint from the areas I had cut in with the wet paint on the roller.


                        how to stencil a tile floor with chalk paint to get the look of Moroccan tile

                       how to stencil a tile floor with chalk paint to get the look of Moroccan tile

I did three coats of white to make sure everything was completely covered, and once that was dry I was ready to start stenciling!

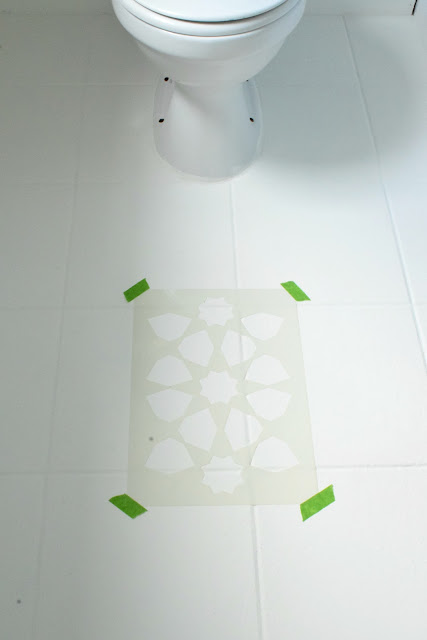
Now, if you've been with me for any length of time you'll know that I don't have the patience for precision unless it's very easy to achieve, so I was more than half convinced that I was going to totally balls this whole thing up. I figured the best way would be to start in the middle and work out, so I eyeballed the centre, stuck it down with frog tape in the corners and got to work.

That's right, no measuring of any kind. It's either pure blind luck that I didn't end up with a total mess or this particular pattern is very forgiving.

                   how to stencil a tile floor with chalk paint to get the look of Moroccan tile

I loaded my roller with the darker paint and then rolled it on some newspaper to get rid of the excess in the hopes of minimising any bleeding underneath the stencil, then firmly rolled it over the stencil until all the shapes were completely filled in. Where the pattern went over a grout line I had to dab at it with a brush to fill it in.

As soon as I was done I lifted the stencil, moved it over until the pattern overlapped perfectly at the side, then stuck it down again and repeated the process. So what I mean is that after the very first one I did there was always a part of the pattern that was already filled in, because I was laying the stencil partially over my previous work. This is what gives you the continuous pattern and helps make sure everything is lined up properly. The paint dried so quickly that I never had a problem with smearing while I was doing this but I did occasionally wipe off the stencil to remove any excess paint that might have seeped under.

I realise that this "overlapping" is the crucial point of this project and probably what I should have taken a million photos of....I don't know what to tell you. I had a couple of hours of kid free time to listen to podcasts, drink coffee and paint and I guess the excitement got to me. So this is all I have......

how to stencil a tile floor with chalk paint to get the look of Moroccan tile


I'm sorry, I hope my shoddy description of the process is enough!


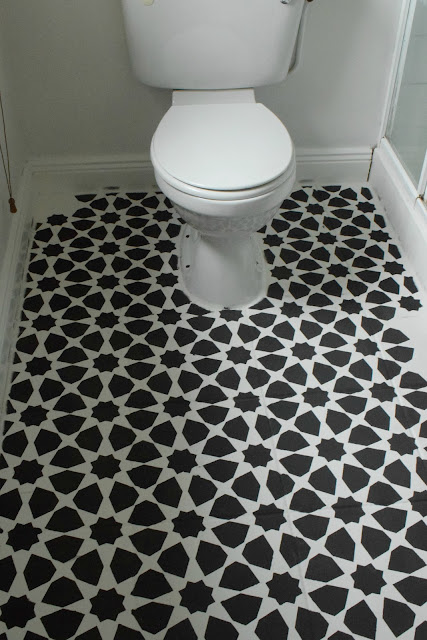
The main parts of the floor went quickly and were relatively painless, but when it got time to get right up to the edges things got a bit trickier. All I did was bend the stencil to get the pattern as close to the edges as I could and roll the paint as normal. I ended up with a small gap the whole way around but it just looks like a grout line. 
                 how to stencil a tile floor with chalk paint to get the look of Moroccan tile


                       how to stencil a tile floor with chalk paint to get the look of Moroccan tile


Once the whole floor was done I went back over it with an artists brush and the white paint and cleaned up the few places where paint had seeped under the stencil like below....

how to stencil a tile floor with chalk paint to get the look of Moroccan tile


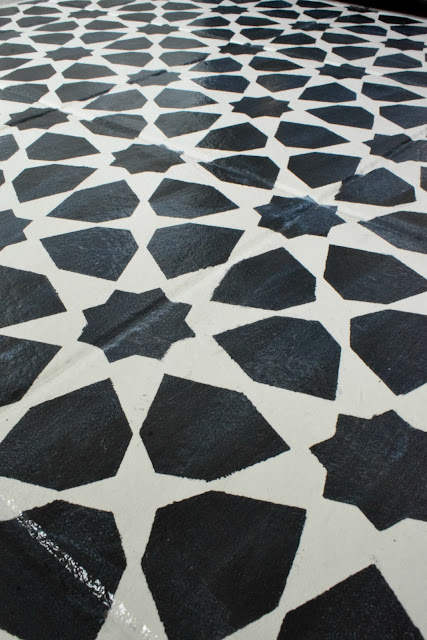
Once everything was dry I went over it with three coats of water based matte varnish to protect it. I should point out that the whole time I was working on this I made sure to walk on it as little as possible and when I did need to I wore socks. Chalk paint is incredibly soft and easy to scratch. Like seriously. I managed to scratch the white layer with my bare feet!

how to stencil a tile floor with chalk paint to get the look of Moroccan tile


The varnish goes on milky but dries clear, and while it does give a very slight sheen this was the matte version so it's not too shiny. Using water based varnish meant it was a much quicker process as each coat dried in an hour. Also it wasn't so stinky that it gave me a headache and it shouldn't yellow over time like oil based products do.

And so it was done!

I have high hopes for this lasting a long time without much upkeep. It already feels sturdier than the kitchen floor ever did, despite the fact that I used specialised products there and in here I'm winging it with products that definitely weren't meant to be used like this. Also it's extremely rare that anyone wears shoes up here, and it's only really cleaned every couple of weeks compared to the daily wear the kitchen got from brushes and mops.

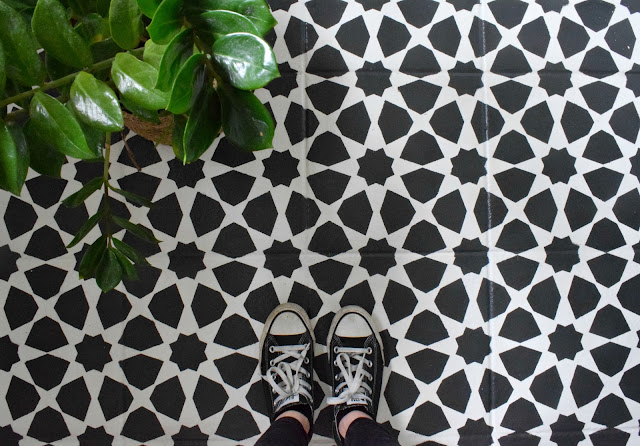
I was honestly surprised at how relatively easy this was, and I'm absolutely delighted with the result. It's a total game changer, and now that I've seen it I can't imagine the space without it! 


What do you think? Have you ever stenciled anything? Will you be giving it a try now? I've put affiliate links to some of the products I used or similar below, and I'd love to see pictures if you end up trying it!

If you liked this post, you might want to check out:


                       how to stencil a tile floor with chalk paint to get the look of Moroccan tile

turning a run of the mill fireplace into a feature

November 06, 2015 0
First things first, the response to my post about giving up work last week got an absolutely amazing response! It was really great to have a rant and here from a lot of people who have been struggling with pretty much the same issues....even if it was weird and uncomfortable for me to share it. Thanks guys! 

*gives awkward pat on shoulder*


So on to today's post! Remember a few years ago when everyone got into feature walls in a big way? It often manifested itself in a chimney breast that was either painted in a strong colour or covered with wallpaper in a striking pattern.

This is the how our chimney breast looked when we moved in...


Now, I like a feature wall as much as the next person, but this just wasn't working in here. It was a small, dark room, and the walls were painted this dark brown and a lighter colour that could be best likened to custard. I had a chocolate pudding sitting room....

Click here to read the rest of this post »

painted tile backsplash-cover those ugly tiles!

Oktober 20, 2015 0
painted kitchen tile backsplash, cheap and easy update for dated tile. www.makedoanddiy.com
This post contains affiliate links


So here we are, another week, another kitchen post, but there's just one more after this and then I'm done, promise! I'm ready to be done with this series, and in future I think I'll post tutorials as they happen and then recap with a full reveal whenever I get it together enough to do that. I feel like I have to finish all these kitchen posts before I move on and it's kinda stifling my creativity ya know? *gag!

Click here to read the rest of this post »

you know how you can pretty much paint anything?......

September 03, 2015 0

diy paint stamped arrow curtains


Finally, finally I am getting around to talking about the curtains for Max's room. It was a really easy and effective diy that I've been meaning to share for a long time, and the main hold up is basically that I'm a really crap amateur photographer and I couldn't get a decent picture of them. So I finally figured I'm not going to be buying a decent camera or taking a photography course anytime soon so I may as well make the best of what i have and just get on with it! So here we go....


diy paint stamped arrow curtains


*disclaimer ~ not only am I a crap photographer with bad tools but these photo's were taken pre-blog, in that scary time when I didn't know you shouldn't take photos at night!


I knew I wanted curtains with some sort of a print that would tie in with a woodland/camping theme, and after months of browsing fabric online and checking ever shop I came across that looked like it might have something suitable I accepted that I wasn't going to find anything that would cost less than €100 for the amount I would need....and that just wasn't happening! 

~ my entire spend on Max's room came to €101 in the end, so you can see how much expensive fabric just wasn't a possibility for me!


Honestly the patterns I was finding weren't really what i wanted anyway, so faced with the problem of coming up with modern, patterned, full length curtains to tie in with Max's room and with no possibilities (and no money even if there had been!) I did what I always do....I went to pinterest! I typed in "diy curtains" and lo and behold there were a million tutorials for painted curtains.

~ I did this project before I did the painted rug for Em's room - this was project 0!

I already had a few pairs of cheap curtains I had gotten last year in Guiney's (they were €5.99 a pair but they were Laura Ashley so I presume they're seconds, there isn't anything wrong with them that I can see so I snapped up four pairs to add to my hoard!) so all I needed was a pattern....and a way of applying it.

I settled on arrows as my image. I've seen them all over recently and I really love them. I originally thought I would cut a stencil and paint over it to create the pattern, but then I realised that seeing as my image was so simple it would be easy to make a stamp...and that would be waaaayyyyy quicker when it came to painting, and more accurate too, win/win!

With this as my plan I picked up a piece of foam from a craft shop, cut my arrow shape out of it and stuck it to another thicker piece of foam (you could use thick cardboard for this too)


diy paint stamped arrow curtains


I had a tester pot of paint in my chosen colour all ready to go.

~I've mentioned it before, but Valspar testers are really generous, there's more than enough for most small projects. I used less than half a pot for the curtains, and I've painted my whole fireplace with one in the past-two coats!


diy paint stamped arrow curtains


I added fabric medium to the paint to make sure I could wash them.


diy paint stamped arrow curtains


Then I tested out my stamp...


diy paint stamped arrow curtains


And off I went! I applied the paint to the stamp with a brush to make sure I didn't get too much on it. It took about two hours to do the whole thing, and then I let them dry overnight before ironing them (to set the fabric medium) and hanging them up.


diy paint stamped arrow curtains


diy paint stamped arrow curtains


                  diy paint stamped arrow curtains


I must say I love them. They're exactly what i wanted and they cost me less than €10 all told!

What do you think? Would you ever paint a pair of curtains?


                                                 Linda xx


                         diy paint stamped arrow curtains


adding some colour to the garden (when you can't grow flowers!)

Agustus 24, 2015 0

painting birdhouses to brighten up the garden


This summer has been a total bust. 

To give you a visual of how much of a bust it has been...as I write this there is rain pounding down so hard outside that it is actually crushing the couple of flowers I did manage to grow, grrr!!! Bloody Irish weather! 

I had visions of spending our first summer in this house sitting out in the garden, surrounded by flowers, having barbecues, you know, generally enjoying finally having some outside space after living in a seventh floor apartment for six years! But alas, it wasn't to be.

So I wasn't going to get my colourful, sunny garden (this year at least), but I still wanted to jazz up the area and add a bit of colour any way I could. I spend a lot of time looking out at that garden so I want it to be cheerful! 

This is what we had to work with....


painting birdhouses to brighten up the garden


So, when I saw some little bird houses in Dealz for €1.49 each I bought a bunch of them (I used two in Max's room) and painted them seriously bright colours that I got testers of from Valspar (in B&Q) when they were having a promotion and selling the testers for €1.60 each, bargain!


                   painting birdhouses to brighten up the garden


painting birdhouses to brighten up the garden


                 painting birdhouses to brighten up the garden


These little pops of colour, along with painting the wall and the shed, really brightened up the place.


painting birdhouses to brighten up the garden


                     painting birdhouses to brighten up the garden


So until next year, when I have another chance at getting my fantasy garden up and going, these little beauties will brighten up the place and give us something pretty to look at when we're standing at the kitchen sink ;)


                          painting birdhouses to brighten up the garden


So that's my little solution to the "Irish summer blues". Things have been a bit crazy here for the last week, big things are afoot in the kitchen! I hope to have a post on that asap, but in the meantime come and follow me on Facebook or Instagram, where I put up "in-progress" photos :)


P.S: Anyone else sick to the back teeth of this weather? 

*sigh*
                                                 
 Linda xx

painted herringbone rug

Juli 27, 2015 0


diy painted herringbone rug


Happy Monday everybody! This post was due to be all about Max's room, full of pretty pictures of the finished product and all the nice little things in it. And then this happened......


diy painted herringbone rug


I made the mistake of taking my eyes off Emilia long enough to actually go to the bathroom by myself the other day (selfish, I know) and when I came out I was greeted with this. Fluorescent pink highlighter all over the lovely wall I JUST painted. 

I'll say this much for her, she knows how to hit you where it hurts!


Killer of dreams, eater of souls, destroyer of walls.


So, after giving her the evil side-eye for a while and imposing a particularly emphatic time-out on her I was ready to forgive and forget.. Once I go back and paint over the pink again of course *sigh*. 

This post is therefore going to be about another project I got done just last week. My dad took the destroyer to a party that his family was having ~not depressed at all about the fact that my toddler has a better social life than me, nope, no sir~ and she stayed overnight so the next morning had a kind of holiday atmosphere here with just one, non-talking child to look after! I watched Judge Judy, I drank entire cups of coffee while they were still hot, I went to the bathroom alone...and then I decided that I should really get something done that I've been meaning to do for ages but had put off cos I needed to do it when she wasn't around and I hadn't been able to muster the energy in the evenings.......


I painted the rug for her room!!!!


                 diy painted herringbone rug


So painting a rug may seem like a strange thing to attempt, but hear me out!

I feel like there's some sort of weird conspiracy going on when it comes to buying rugs here in Ireland. I see all these gorgeous, affordable rugs on pinterest which inevitably come from shops that I don't have access to, and then when I go to look for something similar that I can actually get my mitts on it is either:

a) Tiny.
b) Not in any kind of print anyone with functioning eyeballs would want to be subjected to.
or 
c) So expensive that you'd have to take out a loan to buy it, and then be stuck with it forever cos you paid so freakin' much for it!

As you can imagine, none of these options were going to work for me. 
I am both a possessor of eyeballs and someone who constantly changes their mind about what I like so "b" and "c" were right out.

So I did what I usually do...I typed "diy rug" into pinterest, and as usual, it told me to use paint! So I reckoned it was worth a shot. The rug was for Em's room so it wasn't like I would have to look at it too much if it was hideous or anything ;)


diy painted herringbone rug


I already had this ugly rug that I bought in Ikea last year. It was a panic buy.

I'm slowly, s  l  o  w  l  y learning that I do not have to make purchases even though I can't find what I want just because I "need" something. Last time I checked no-one takes your kids away cos they've come into contact with naked floors!

I had gone with the intention of buying a softer, patterned grey rug for the living room, but when that was sold out I picked this up cos it was the right size and a neutral colour, and cheap (€60) so I figured it'd get used somewhere. Turns out it was actually a really ugly grey/brown, nothing like the nice sisal rug I already had and thought it was similar to. Also, it stained REALLY easily, not good.

So long story short, I hated this rug anyway, so it didn't matter if the project didn't go to plan. 

Basic rule of thumb when making decorating decisions~you can't ruin something you already hate people, take a chance!

It was such a rough fabric/tight weave (not sure how to describe it really) that I thought it would take paint perfectly, plus I was pretty sure that since it was already on the rough side the paint wouldn't be noticeable underfoot.


diy painted herringbone rug
Stains! Stains everywhere, and this was after I tried to clean it!

So I gathered up different paints, enough containers and brushes for the colours I wanted to use and some fabric medium that I had already from making curtains (tutorial coming soon, I promise) and I got to work.


diy painted herringbone rug


First, Max did the math and figured out that four sections across and five down would look best (I wanted a large pattern). So we divided the width (160) by four and saw we needed to tape off every 40 cm. The tape was exactly 2cm wide so we taped from 39-41 cm, 79-81 cm and 119-121 cm to make sure it was even. The weave of the carpet was in little squares, two of which were exactly the same with as the tape and ran in straight lines down the rug, which was very, very satisfying for someone who likes precision....but is usually in too much of a rush to get it!


diy painted herringbone rug


diy painted herringbone rug


I laid a strip of wood across at the 46 cm point (230 divided by 5) so I could lay the next pieces of tape corner to corner without measuring each time, make sense? You're basically just making a lot of large triangles.


diy painted herringbone rug


About an hour in it was all taped up and ready for paint. At this point I almost convinced myself that I liked it with the tape on and I should just stick with that....I am so impatient.


diy painted herringbone rug


I quickly went back over the points where the tape crossed over and cut away any excess to make sure I'd end up with crisp lines. i also went back over everything and made sure it was all pressed down properly.


diy painted herringbone rug


diy painted herringbone rug
Tip-use the roll of tape to go back over your lines and rub them down to stop the paint bleeding-it's the exact same width so you won't miss anything


Then I mixed up the colours I wanted using some fabric medium and regular wall paint I had left over. I'm not sure how beneficial fabric medium was for this project cos it's not like it's ever going in the washing machine, but it did make the paint dry a bit softer than it would have been I think. Plus, it's no harm to have it for when I inevitably have to try and scrub stains off the rug later.


diy painted herringbone rug


diy painted herringbone rug
I bought the delta one online and the other one in a craft shop. The Berol is much cheaper and doesn't smell odd like the delta so I'd definitely go for that again.


So I started applying the paint, and as per usual I didn't have a definite plan for what colours would go where, I just knew I wanted more grey and white than pink and mint, and I wanted the colours spread out fairly evenly.


diy painted herringbone rug
Ack, those thiles. The more I see those them in photos the more I hate them. 
Your number is up tiles, I'm not putting up with you much longer, you will offend me no more!


diy painted herringbone rug


Once I finished all the colours I pulled off the tape and let the whole thing dry. It took two days to be fully dry, quite a lot of paint soaks into the fibres.


diy painted herringbone rug
Still damp


diy painted herringbone rug


So there you have it. I'm pretty pleased with it all in all, it brings a bit more pattern and colour to Emilia's room that I could tailor exactly how I wanted it, it didn't cost the earth, and if I want to change it in six months I won't feel guilty about it. I think I'll even do this again to make a rug for the dining room.

Now, as usual I did things wrong and made mistakes that could have been avoided if I'd just thought a bit more beforehand and had reigned in my impatience to get started...but hey, I'm too old to change at this point. Luckily though I can impart that hard-earned knowledge to you so you don't do the same! So here you go....

1) The fibres will soak up a LOT of paint, make more than you think you'll need, even adding just fabric medium will change the colour slightly so if you try and make up another batch it won't match and you'll end up with patchy bits.

2) Don't remove the tape until you are completely finished painting-if you try to touch up parts after you won't be able to go right to the edges and again this will turn out patchy.

3) If you need to add more paint, apply it to the whole section, not just the part you think needs it-again with the patchiness.

All these things happened to me and I did end up with patchiness in some areas, but I was going for more of a faded/imperfect look rather than having super saturated colour in the hopes that stains/wear and tear won't show so much, so I'm ok with it. But if you want perfection, just do as I say, not as I did ;)


                  diy painted herringbone rug


What do you think? Have you ever painted something that wouldn't normally be painted? Let me know in the comments!

Linda xx


If you liked this post, you might also like:


x

Entri yang Diunggulkan

my favourite interior trends this season